Day 1 of Baby Chicks How Much Food Do Baby Chicks Need
A mistake at the hatchery has delayed us getting our baby chicks, but when they get here I want to have an outline of what to expect. I have compiled this week by week plan to help keep us in the know with our own baby chicks. If you are getting baby chicks or just want an outline to refresh your memory, I hope you find this helpful also.
In my last post we discussed how to make a DIY brooder and the supplies that you will need before you get your chicks home. To read the post click HERE.
A Week by Week Plan
Less than 1 week old
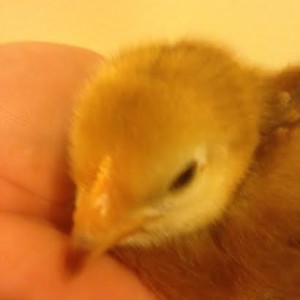
After baby chicks are hatched they ingest their yolk sac for up to 72 hours. This provides them will all the nourishment they need during this time, which allows hatcheries to mail day old chicks. After 72 hours their yolk sacs are gone and they need food and water.
Baby chicks, less than one week old will need to be kept at a temperature of 90 degrees Fahrenheit.
When you first get your chicks, dip their beaks into the water to 'teach' them how to drink. Do the same with their food. They are creatures of habit and will quickly learn this life skill.
Keep their bedding clean of moisture and poo.
For the first week of their life, the chicks will sleep quite a bit.
Week 2
Bring the brooder temperature down 5 degrees to 85 degrees F. Raising the brooder lamp a few inches will help accomplish this.
Keep plenty of food and water available at all times for the chicks. This allows them to eat and drink when they want, and will help them to grow into healthy chickens. Keep the food free of moisture and poo.
Clean or replace the bedding material as needed.
Feathers will begin replacing the 'fluff' on the chicks.
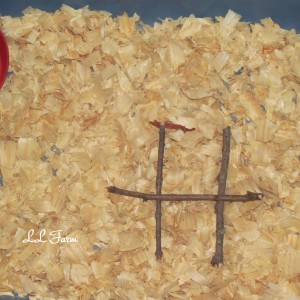
As they grow, they have a natural desire to roost. Consider adding a perch for the chicks. You can easily create one with three small twigs, placing them in the shape of an 'H'.
Interact with the chicks. This will help them to become familiar with you and learn to trust you.
Week 3

Bring brooder temperature down another 5 degrees to 80 degrees F.
Continue to keep plenty of clean food and fresh water available at all times.
Clean or replace the bedding material as needed.
As the chicks grow, so may your brooder. Switch to a larger container if it looks like the chicks are crowded.
Lots more feathers start to appear on the chicks.
Week 4
Bring brooder temperature down another 5 degrees to 75 degrees F. Raise the heat lamp another few inches higher to accomplish this.
Continue to keep food and water available to the chicks at all times. Keep the food clean from moisture and poo. Change the water as needed.
Clean or replace the bedding as needed.
Week 5 – The 'Teens'
As long as the temperature does not fall below 60 degrees F, you can remove the heat lamp. This may be a good time to move the brooder to a different location, if appropriate. Perhaps the garage or ban instead of inside the house. Just make sure that the temperature does not fall below 60 degrees F.
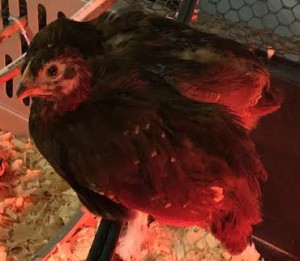
Adult feathers start to appear on the chicks.
As you finish the starter feed, you can begin mixing it with some finishing food. Once the starter feed is gone, they should be eating finishing food. Continue to give them plenty of food and water to help them mature.
Clean or replace the bedding as needed.
Add another perch if necessary.
Week 6
If weather permits, you can move the chicks outside. It is best to keep them in a fenced area to begin with. Make sure they go inside a coop at night. To see our DIY coop, click HERE. Close and lock the door at night to keep them safe from predators. Chickens are creatures of habit. Making this a routine for your chicks will help them to know what to do every evening. Once they learn this habit, you can allow them to free range during the day if you want. They should come back to the coop around the same time nightly.
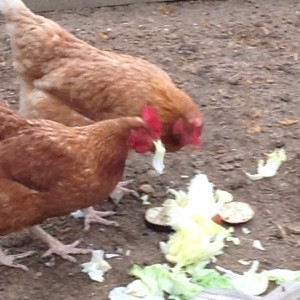
Start introducing kitchen scraps to their diet. Lettuce, tomatoes, and strawberry tops have proved to be favorites of our chickens. Click HERE to read about some common garden varieties that are good for chickens.
Week 7 through Week 15
Now that the chickens are living outside, they will be scratching around on the ground and eating delicacies like worms, insects and grass. Feed them finishing food at least twice a day to help them continue growing. Also, continue to feed them kitchen scraps. Give them fresh water daily.
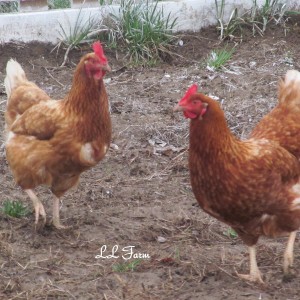
They will know you and trust you. They will know their daily routine. Let nature take its course and enjoy watching your flock of chickens flourish.
Week 16
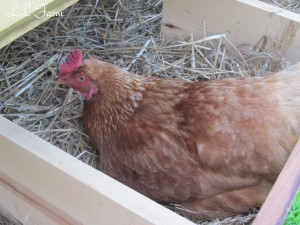
Put something in one of the nesting boxes to encourage egg laying. My Great Grandma used a round door knob, we use a golf ball, some use a plastic egg, others use a rock. You get the idea.
As the chickens are completing the finishing food, begin mixing it with layer feed. Once the finishing food is gone, they will be on layer food from here on out. Feed them twice a day (morning and afternoon). Change their water daily or as needed, making sure they always have water available.
Week 20
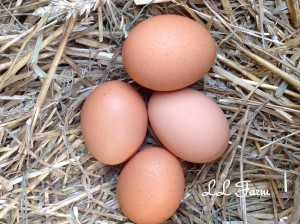
Around this time they should be laying eggs. The first time you hear the egg laying song, you will smile and maybe even laugh. Enjoy your farm fresh eggs and your chickens!
* Thank you to my friend Susan, for sharing her adorable baby chick photos used in this article. *
Day 1 of Baby Chicks How Much Food Do Baby Chicks Need
Source: https://www.communitychickens.com/a-week-by-week-plan-for-raising-baby-chicks/
Post a Comment for "Day 1 of Baby Chicks How Much Food Do Baby Chicks Need"